.png)
Clinician Backed Photo Literacy: Teeth Whitening Before and After

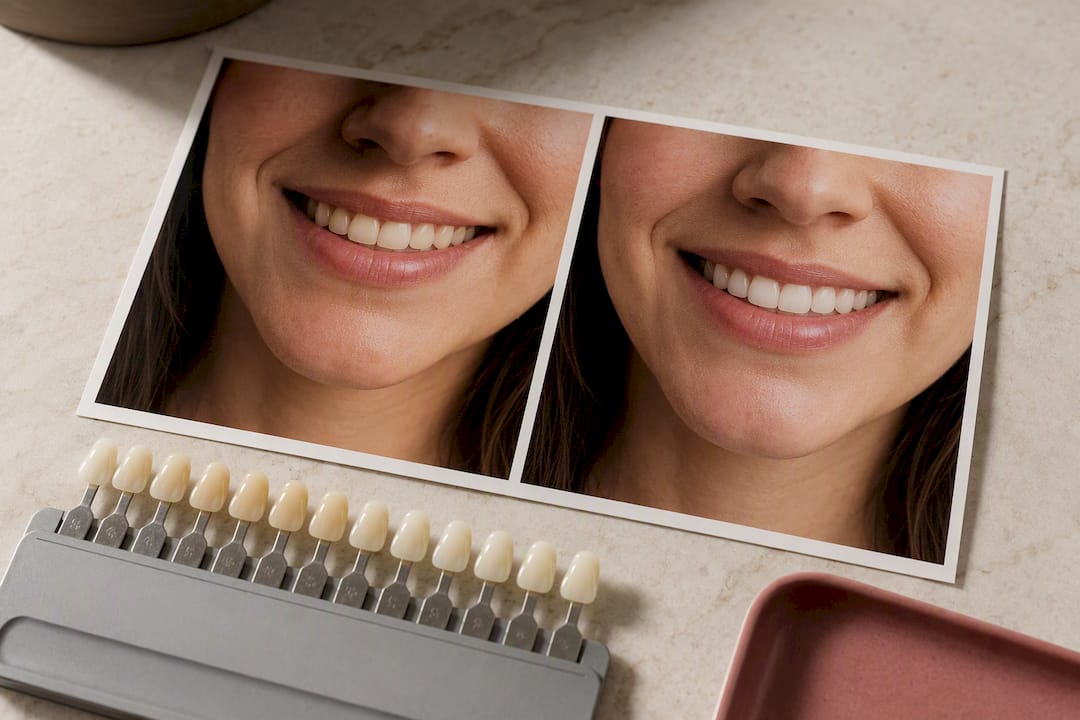
Most people see a noticeable shade improvement from professional treatment, and in-office bleaching delivers the fastest, most dramatic change of any method available. That speed comes with a tradeoff: temporary sensitivity is common in the first 24 to 48 hours. Before you trust any before-and-after photo online, know that lighting and camera angle can exaggerate results just as easily as a whitening gel can produce them.
TL;DR:
Professional whitening can produce a visible two to three shade improvement with minimal sensitivity if properly planned and executed.
In-office treatments offer the fastest, most predictable results but carry a higher risk of short-term sensitivity compared to take-home trays.
Results vary depending on the type of stains, initial tooth shade, and enamel thickness, with intrinsic stains responding less effectively.
Whitening effects typically last six to twelve months and require consistent maintenance to prevent relapse, especially with stain-reintroducing habits.
Photos often exaggerate results due to lighting, angles, or editing; standardized documentation and realistic expectations are essential for accurate assessment.
Table of Contents
Teeth Whitening Before and After Examples, Annotated
Photos only tell the truth when you know what to look for. A single dramatic “after” shot means nothing without context on the starting shade, the method used, and whether the lighting matched between shots. Here’s how to read a real case instead of a staged one.
In-chair case: Starting shade A3, single 45-minute in-office session, ending shade B1. Sensitivity noted for 12 hours, resolved without intervention.
Dentist take-home trays: Starting shade A2, two weeks of nightly 10% carbamide peroxide trays, ending shade A1. Gradual shift, minimal sensitivity reported.
OTC strips: Starting shade A3.5, 14 days of daily strips, ending shade A3. Modest but visible change, consistent with typical OTC results.
Mixed dentition case: Natural teeth whitened three shades; existing front veneers stayed the same color, creating a visible mismatch the patient hadn’t anticipated.
When a clinic shows you its own gallery, check for a shade-guide card held next to the teeth in both photos, identical background color, and the same camera distance. If a page only shows one angle, one lighting setup, and no shade reference, treat the result as a marketing image rather than clinical proof.
What Kind of Shade Change Should You Expect by Method?
Method drives outcome more than any other single factor, and the differences are well documented in clinical literature. Here’s what each approach realistically delivers, and how fast.
In-office professional whitening. A single visit using high-concentration peroxide gel typically produces the largest shift, often several shade-guide units, visible immediately after the appointment. This is the method systematic reviews and clinical trials point to for the most predictable results, though it also carries the highest short-term sensitivity risk.
Dentist-supervised take-home trays. Custom trays with lower-concentration gel, worn nightly for one to two weeks, build results more gradually. A randomized trial found that 10% carbamide peroxide trays matched in-office 35% hydrogen peroxide outcomes when patients followed the protocol closely, with notably less sensitivity.
OTC strips and pens. Lower peroxide concentrations and inconsistent application mean smaller, less predictable shifts, generally one to two shades over two to three weeks of daily use.
One detail trips people up regardless of method: light activation devices (LED or laser) marketed alongside whitening gel add no proven benefit. Reviews of the evidence found no measurable improvement in outcome or durability over peroxide gel alone. And no method changes the color of crowns, veneers, or fillings. Front-tooth restorations will stay exactly the shade they were placed, which is why the timing of whitening relative to restorative work matters.
Why Do Two People Get Different Results From the Same Treatment?
The gel matters less than what you’re bleaching. Extrinsic stains, the surface discoloration from coffee, tea, red wine, and tobacco, respond well to almost any whitening method because they sit on the enamel surface. Intrinsic stains, caused by aging, certain medications, or old trauma to a tooth, sit deeper in the dentin and respond more slowly and less completely.
Your starting shade sets your ceiling. Someone starting at a yellowish A3 will see a more obvious visual jump than someone starting at a grayish B2, even with identical treatment, because gray-based discoloration is notoriously harder to lift.
Enamel thickness varies by person and by tooth, and thinner enamel lets more of the underlying dentin color show through, which can limit how bright a tooth ultimately appears. Habits after treatment matter just as much as the treatment itself:
Coffee, tea, and red wine reintroduce surface stains within days if consumed without a straw or rinse.
Smoking undoes whitening progress faster than almost any other habit.
Inconsistent brushing lets new stains bond to the same enamel you just brightened.
What Side Effects Should You Expect, and How Long Do They Last?
Sensitivity is the most common side effect of any peroxide-based whitening, and it’s almost always temporary. Cleveland Clinic’s guidance confirms whitening is generally safe when used correctly, but flags sensitivity and gum irritation as common, usually short-lived reactions. Higher peroxide concentrations, the kind used in-office, tend to produce more noticeable short-term sensitivity than lower-strength take-home formulas.
Gum irritation happens when gel contacts soft tissue, either from an ill-fitting tray or an overfilled one. It typically shows up as mild whitish patches or tenderness that fades within a day.
Pro Tip: Switch to a desensitizing toothpaste containing potassium nitrate about a week before starting any whitening treatment. It gives your nerves a head start on tolerance.
Contact a dentist if pain lasts longer than a few days, or if you notice blistering, bleeding, or tissue that doesn’t return to normal color. Shortening wear time, spacing out sessions, or switching to a lower concentration under professional supervision usually resolves ongoing discomfort without stopping treatment altogether.
How Do You Spot a Doctored Before-and-After Photo?
Not every dramatic transformation online is real. Some are lit, angled, or edited to exaggerate the change, and learning to spot the tells protects you from unrealistic expectations before you ever book an appointment.
Compare lighting temperature and brightness between the two shots. If the “after” photo is noticeably whiter overall, including the skin and background, exposure has likely been adjusted.
Check the camera angle and distance. A closer, more direct “after” shot will always look brighter than a shadowed “before” taken from farther away.
Look for a shade-guide reference held next to the teeth. Clinics with nothing to hide usually document cases under consistent lighting, often with that shade card visible in both frames.
If you’re still unsure, ask the clinic directly for raw, unedited files or a series of standardized cases rather than a single hero image.
How Long Do Whitening Results Actually Last?
Results fade gradually rather than all at once, and the timeline depends heavily on habits. Most people notice some relapse within six to twelve months, faster if you drink a lot of coffee, tea, or red wine, or smoke.
Touch-up trays or a short at-home regimen every six to twelve months maintain the original shade far more effectively than a single treatment left alone.
Pairing an in-office session with scheduled monthly touch-ups at home extends color persistence noticeably longer than relying on one appointment.
For the first 48 hours after any whitening session, avoid deeply pigmented foods and drinks. Enamel is temporarily more porous immediately after treatment and picks up new stains more easily during that window.
Rehydration also plays a role you won’t see mentioned often: teeth can look especially bright for the first few days post-treatment simply because they’re dehydrated from the whitening process, and you may notice a slight rebound as they rehydrate over the following week. That’s expected, not a sign the treatment failed.
A Clinician’s View on What Before-and-After Photos Really Prove
Chevonne, Dermal Clinician at Fundamentalskin, has spent 15 years assessing which skin and smile concerns respond to non-invasive treatment and which need a different approach entirely. Not every case belongs on a whitening treatment plan. Deep intrinsic staining, extensive front-tooth restorations, or uneven enamel wear sometimes call for veneers or bonding instead, and an honest consultation says so before treatment begins rather than after.
Photo documentation only means something when it’s standardized. Every case should be shot under the same lighting, from the same angle, with a shade-guide reference visible in frame.
Consistent documentation isn’t a formality. It’s the difference between a photo that proves a result and one that just looks impressive.
At Fundamentalskin, that consultation step exists specifically to catch mismatches early, before a client is disappointed by a whitened smile sitting next to an unchanged veneer.
Does Age or Tooth Type Change How Well Whitening Works?
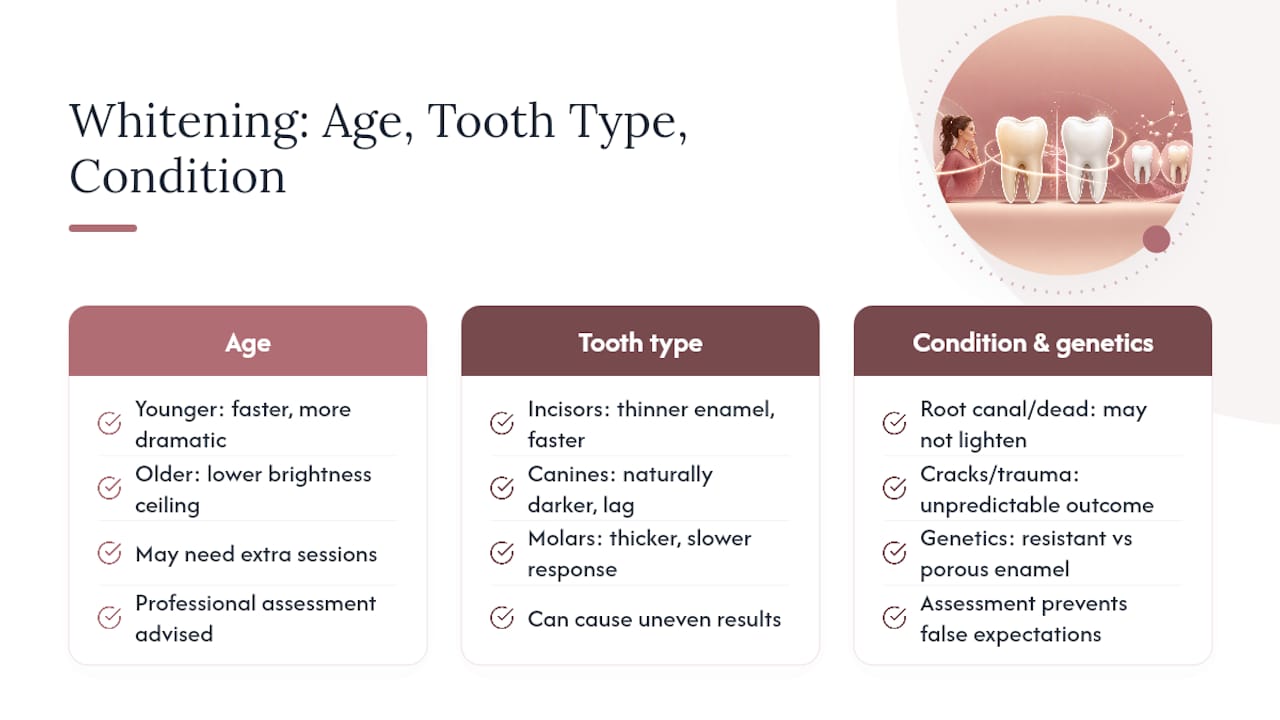
Younger enamel tends to respond faster and more dramatically to whitening than older enamel, largely because enamel thins and becomes more translucent with age, letting more of the naturally yellower dentin show through. That doesn’t mean whitening stops working as you age. It means the ceiling on how bright your teeth can get is lower, and the process may take a session or two longer to reach a visible result.
Tooth type matters just as much. Front incisors, which have thinner enamel than molars, often lighten faster and more visibly because there’s less tissue for the gel to penetrate. Canines, which naturally sit slightly darker than the teeth around them, sometimes lag behind in a whitening series, creating uneven results if a treatment plan doesn’t account for it.
Teeth with visible internal cracks, prior trauma, or root canal treatment behave unpredictably. A tooth that’s dead or has had endodontic treatment often discolors from the inside and may not lighten at all with surface-applied gel, regardless of concentration or wear time.
Genetics plays a quieter role too. Some people are simply born with denser, more opaque enamel that resists staining in the first place, while others have naturally thinner, more porous enamel that stains easily and whitens just as readily. None of this is something you can diagnose by looking in a mirror, which is exactly why a professional assessment before starting treatment saves you from chasing a result your teeth were never going to give you.
What Should You Do Before Your First Whitening Session?
Skipping preparation is the single most common reason people get underwhelming results. A professional cleaning beforehand removes surface plaque and tartar that would otherwise block the whitening gel from reaching the enamel evenly, which means you’re paying for a treatment that can’t fully do its job.
A pre-treatment consultation should check for cavities, exposed dentin, or gum recession, since whitening gel on compromised tooth structure or irritated gum tissue is where most of the reported discomfort comes from. This is also the moment to flag any existing restorations on visible teeth. Whitening happens before any restoration replacement, not after, so the new filling, crown, or veneer can be matched to your brightened shade rather than to the shade you’re trying to leave behind.
If you have any known sensitivity, starting a desensitizing toothpaste a week or two ahead of treatment gives your teeth a head start on tolerance. And if you’re a heavy coffee, tea, or red wine drinker, don’t expect one session to undo years of buildup. Ask about a staged plan instead of a single aggressive appointment.
How Do You Protect Your Results After Treatment?
The first 48 hours matter more than any other stretch of the entire process. Enamel is temporarily more porous right after bleaching, so it picks up new stains faster than usual, which means the habits you skip in that window have an outsized effect on how long your results last.
Stick to a “white diet” for two days: think chicken, rice, pasta with light sauces, and water instead of coffee, tea, red wine, or dark juices. A straw helps if you can’t avoid staining drinks entirely. Avoid tobacco products completely during this window, since smoking reverses whitening progress faster than nearly anything else you could do.
Beyond the initial 48 hours, a consistent oral hygiene routine, brushing twice daily and rinsing after staining foods, keeps new discoloration from bonding to the same enamel you just brightened. A touch-up tray session every six to twelve months, rather than waiting until the color has fully relapsed, keeps maintenance smaller and more manageable than starting over from your original shade.
Common Misconceptions About Teeth Whitening Before and After Photos
The biggest misconception is that a dramatic transformation photo represents a typical result. Most real cases show a moderate, believable shift, not the blindingly white smile some marketing images suggest, and photos edited for exposure or lighting can make a two-shade change look like a five-shade one.
Another common myth: whitening works the same on everyone. It doesn’t. Two people with different baseline shades, enamel thickness, and staining types can use the identical product and see meaningfully different results.
People also assume whiter always means better, but there’s a natural ceiling past which teeth start looking artificial rather than healthy. And many assume results are permanent. They aren’t. Without any maintenance, most people see some fading within a year, which is a maintenance issue, not a treatment failure.
Finally, plenty of people believe existing crowns or veneers will whiten along with natural teeth. They won’t, which is exactly why a consultation before treatment matters more than the treatment itself in cases with visible restorations.
Why Photo Literacy Matters More Than the Marketing Says
The whitening industry sells transformation. What it should be selling is calibrated expectation, and that’s the gap most before-and-after content never closes. A two-shade change is a legitimate, visible result. It’s also far more common than the five-shade leaps that dominate marketing galleries, and treating the exception as the rule sets almost everyone up for disappointment.
The conventional advice, “just pick the strongest product,” ignores that concentration without supervision raises sensitivity risk without guaranteeing a proportionally better outcome. Evidence points to well-executed home trays holding their own against in-office treatment in some trials, which should reframe how people choose between the two rather than assuming price and speed always buy better results.
If you take one thing from this, prioritize the consultation over the product. Your enamel, your baseline shade, and your restorations decide your ceiling long before any gel concentration does. Ask questions before you ask for the brightest option.
— chevonne
Ready to See Your Own Real Results?
Fundamentalskin’s teeth whitening starts where too many at-home kits skip the step that matters most: an actual assessment of your teeth, gums, and any existing restorations before gel ever touches your enamel. That consultation catches the mismatches, veneers that won’t whiten, sensitivity risks, uneven staining, before you’ve spent money on a result that won’t hold up in the mirror.

The Signature Teeth Whitening service pairs professional-grade whitening with the shade-guide documentation this guide recommends, so you get a real before-and-after record, not a marketing photo. Clients typically see a visible two to three shade change in a single session, with the option to step up to Platinum Teeth Whitening for deeper discoloration. Book a consultation to find out which option fits your starting shade, and walk in knowing exactly what result to expect before you sit down.
This article is general information, not a substitute for advice from a qualified doctor. Consult a qualified healthcare professional about your own circumstances before acting on anything here.
Sources
Recommended
Comments